How to Draw Albert Page 2

17

17. Draw straight lines at each end then connect these straight lines with four more loops.

18

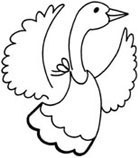
18. Draw three tail-feather loops near the middle of his wing.

19

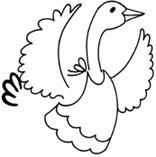
19. Begin at the tail feathers and draw a big curve reaching all the way to the bottom of the apron.

20

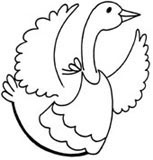
20. Draw his legs. Two lines close together, for each leg.

2122

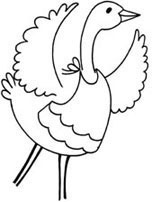
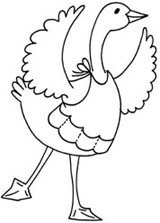
21. End with three of the letter "V" to form a duck foot. Also, finish your drawing with a couple of details: Draw a line for his back from the ties to the wing. Draw a tie from the apron up to the wing. And lastly, add the little dotted lines (stitching) to the pockets, from point to point.

28
29
28
29
28
29
28
29

Now you are ready to draw items into Albert’s pockets. I like to draw a pencil, a rolled-up piece of paper and a ruler.

To draw the rolled-up piece of paper begin with a spiral.
23
Draw a gentle curve below your spiral.
24
Now draw two lines, from the outside edge of the spiral to the ends of the curve.
25
Now comes the fun part. NO LINES SHOULD CROSS OVER. Draw a line from the outside edge of each of the inner spiral curves down until you run into a line. Keep going until you have reached the inside of the spiral.

2427

MORE PENCIL-PAPER TOPICS

BACK| HOME PAGE | BOOKS PAGE | GALLERY | KIDS PAGE | TEACHERS/LIBRARIANS